


For RESU 7H and RESU10H (Type C, Type R and Type R (Secondary)).
There are two methods to check the serial number which appears in two places.
1. Underneath the battery, adjacent to the cable entry. By using the "Is Your Battery Safe?" app, you can scan this label. Giving you the status of the battery.

Please note that with this method, it may not be possible to capture the QR code, meaning you need to transcribe the serial number manually in the mobile app.
2. Behind the access cover at the bottom right of the battery. To access:
(i) Open the two latches by pressing the child-proof tab with your thumb before unlatching.

(ii) Remove the access cover by opening slightly (2-10 degrees) and lifting off. Be sure to lift the door off - it is not hinged.


(iii) You can then see the serial number label on a clear plastic cover. You can either scan the QR code or transcribe it manually in the "Is Your Battery Safe?" mobile app.


Understanding the RESU Battery Serial Number
The following illustration shows how the unique serial number appears on a sample ESS RESU Home Battery. Serial numbers begin with "R" or "E" and are 22 or 23 characters (a mix of letters and numbers). The first row depicts the model number and the second row starts with the date of manufacture, ending with unique number for that model. To see the example below, the unique serial number is "R15563P3SSEG11610317001"; however it can be broken down to "R15563P3SSEG1" as the model number, "171215" as the manufacture date (in YY MM DD order), and "9013" as the unique lot number.


There are two methods to switch off the battery.
1. Follow the "Shutdown Procedure" on your inverter. Which is located on or around your invertor. Instructions may vary depending on the type of inverter you have.
How to switch off your RESU battery

2. Follow the below procedure
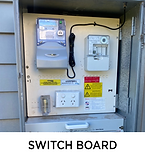
(i) Switch off the AC Isolator, which might be labeled as "AC Isolator," "Solar Supply AC Isolator," or "Inverter Isolator." If there is no AC Isolator near the inverter, toggle the switch labeled "Inverter AC Isolator" or "Solar Supply Main Switch" inside your switchboard.


(ii) Switch off the "PV Array DC Isolator."

(iii) Wait 15 minutes.
(iv) Confirm battery lights have gone off.

(v) Switch back on the "PV Array DC Isolator."
(vi) Turn back on the AC Isolator or Solar Supply Main Switch.
